 Strata Design Journal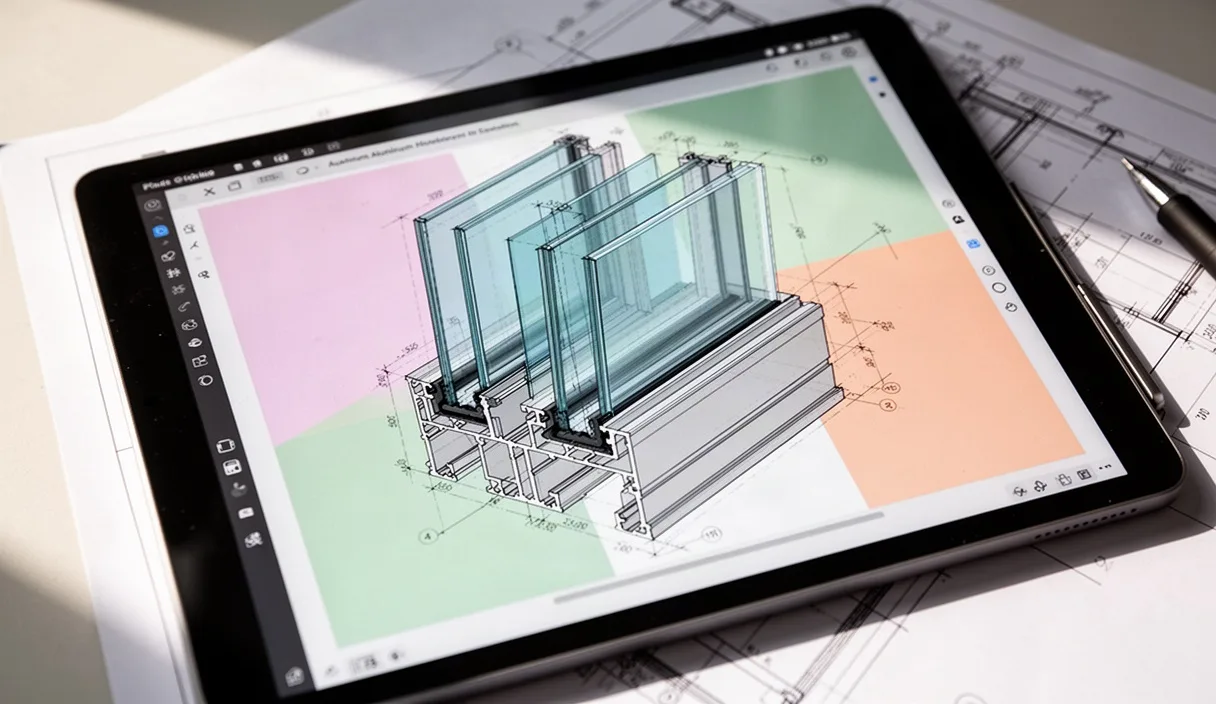

Detail drawings for direct-glazed curtain walls represent the ultimate test of building envelope design. A schematic elevation conveys architectural intent, but the section details dictate whether the completed assembly stops water infiltration, resists wind loads, and maintains internal surface temperatures above the dew point. When draftspersons leave gasket compression ratios, drainage paths, or fastener torques unspecified, field installers resolve those ambiguities under schedule pressure, frequently with disastrous results.
Every line on a curtain wall shop drawing must correspond to an intentional physical boundary or air cavity. Direct-glazed stick assemblies place the insulated glass unit directly against internal structural mullions and transoms, held in place by exterior pressure plates. This construction brings structural, thermal, and moisture-control functions into close spatial proximity, often within an envelope zone no wider than 75 millimeters. Controlling performance requires explicit drawing callouts backed by engineering calculations rather than standard catalog details.
Thermal Envelope Continuity Across Structural Mullions
Thermal breaks must align continuously across horizontal and vertical profiles. When aluminum frames lack proper thermal isolation, interior mullion faces drop below the interior dew point during cold weather, producing condensation that damages interior finishes and promotes biological growth. Detail drawings must show the thermal isolator, typically extruded polyamide reinforced with 25 percent glass fiber, set in the same physical plane as the primary glass spacer.
A frequent error involves breaking the plane of insulation at corner mullions or structural transition anchors. If an internal structural steel stiffener inserts into an aluminum mullion cavity to increase wind load resistance, the anchor must sit fully on the interior side of the polyamide thermal strut. Steel fasteners penetrating from exterior pressure plates into the internal mullion screw spline must pass through pre-drilled holes in the isolator or screw into isolated splines separated by minimum 12-millimeter polyamide strips.
For buildings situated in climates with cold winters, calculate two-dimensional heat flows through the mullion profile using finite element software complying with ISO 10211. Specify the target frame thermal transmittance (U-factor) directly on the section drawing. For a standard 65-millimeter sightline system, high-performance profiles typically achieve U-frame values between 1.2 and 1.9 W/(m²·K). Ensure the drawing calls out the specific cavity low-emissivity foils or polyolefin foam inserts that field crews must place within the thermal break void before installing the exterior pressure plate.
Glazing Pocket Drainage and De-pressurised Weep Holes
Water will inevitably penetrate the exterior wet seal or the primary outer gasket line during wind-driven rain events. Direct-glazed curtain wall engineering relies on the pressure-equalized rainscreen principle to manage this water. Detail drawings must delineate three distinct zones: the exterior weather seal, the pressure-equalized glazing cavity, and the interior airtight seal.
To establish pressure equalization, the volume of air within the glazing rebate must equalize with exterior barometric pressure almost instantaneously. When external wind pressure rises, air moves through exterior weep openings into the glazing pocket. Because the interior air seal remains completely airtight, the pocket pressure matches the exterior gust pressure, eliminating the pressure differential that drives water inward. Water that enters drains out purely by gravity over the horizontal sill plate.
Draft horizontal transom details with zone-drained chambers rather than mullion-drained systems unless the building geometry strictly demands continuous vertical drainage. Zone drainage isolates each glass unit within its own perimeter rebate, preventing water from draining onto lower panels. Specify weep holes with dimensions that prevent capillary action while resisting wind back-pressure:
- Provide at least two weep slots per horizontal glazing pocket, located approximately 50 millimeters inward from each setting block.
- Dimension weep slots to a minimum of 8 millimeters by 25 millimeters, or use circular weep holes with a minimum diameter of 10 millimeters.
- Call out cellular plastic anti-nesting baffles or open-cell reticulated foam inserts within every weep aperture to block insect intrusion and prevent wind gusts from directly forcing water back into the pocket.
- Detail continuous sill flashings with minimum 100-millimeter vertical end dams beneath the lowest curtain wall boundary, with clearance for drainage out over the substructure.
EPDM Gasket Sizing and Elastic Recovery Properties
Dry-glazed systems rely on elastomeric gaskets to form the exterior weather barrier and the interior air-and-vapor barrier. The performance of these barriers depends on maintaining correct gasket compression over decades of thermal cycling. Detail drawings must specify raw material chemistry, Shore A durometer hardness, and nominal compression percentages.
Specify Ethylene Propylene Diene Monomer (EPDM) formulated in compliance with ASTM C864 or EN 12365. For interior primary air seals, use dense EPDM profiles with a Shore A hardness of 60 to 70. Interior gaskets must maintain continuous contact under negative wind loads that pull the glazing outward. For exterior pressure plate applications, specify either dense EPDM with a Shore A hardness of 55 to 65, or cellular (sponge) EPDM with an engineered hollow core. Sponge gaskets compress more readily, distributing clamping pressure evenly across glass surfaces with variable thickness tolerances.
| Gasket Location | Material Type | Durometer (Shore A) | Designed Compression | Primary Function |
|---|---|---|---|---|
| Interior Frame Bed | Dense EPDM | 65 ± 5 | 20 to 25 percent | Airtight boundary and vapor barrier |
| Exterior Pressure Plate | Dense or Microcellular EPDM | 60 ± 5 | 25 to 35 percent | Water shed and mechanical glass retention |
| Intermediate Thermal Isolator | Closed-Cell Co-extruded EPDM | 45 ± 5 | 30 to 40 percent | Convective air loop dampening |
Elastic recovery dictates long-term performance. Drawing notes must mandate a maximum compression set of 25 percent when tested according to ASTM D395 Method B for 22 hours at 70 degrees Celsius. If gaskets take a permanent set, the seal fails during cold contraction periods. Furthermore, forbid field-cut miter joints at corners. Require factory-molded or vulcanized corner assemblies on drawings. Field installers must place molded corners first, then work the straight gasket lengths into the aluminum raceway with a 1.5 to 2.5 percent longitudinal over-length to prevent shrinkage gaps over time.
Thermal Expansion Calculations for Multi-Storey Mullion Runs
Aluminum exhibits a high coefficient of linear thermal expansion compared to steel and concrete. Extruded architectural aluminum (alloy 6063-T6) expands and contracts at approximately 0.023 millimeters per meter per degree Celsius (23 × 10⁻⁶ / K). On multi-storey stick-built facades, unaddressed thermal movement shears fasteners, breaks glass edge seals, and tears perimeter weather flashings.
Calculate the expansion gap using the maximum expected surface temperature range of the metal frame, not simply ambient air temperatures. Dark bronze or black anodized profiles exposed to direct solar radiation regularly reach 75 degrees Celsius in summer, while dropping to minus 20 degrees Celsius or lower in cold winter conditions. This creates an operating temperature delta of up to 95 degrees Celsius.
Consider a continuous vertical mullion run spanning three storeys, totaling 11.4 meters between primary building expansion interfaces:
- Total length (L): 11,400 millimeters
- Temperature swing (ΔT): 95 degrees Celsius
- Coefficient (α): 0.023 mm/(m·°C)
- Total movement: ΔL = 11.4 × 95 × 0.023 = 24.9 millimeters
To accommodate this movement, vertical mullions require engineered splice joints placed at points of low structural bending moment, typically located between 15 percent and 20 percent of the floor span above a floor slab anchor. Detail an internal aluminum sliding sleeve fixed to the lower mullion tube and allowed to slip inside the upper tube. Detail drawings must call for a minimum 15-millimeter physical expansion gap between mullion ends at room temperature, protected by an internal EPDM membrane sleeve set in non-curing polyisobutylene sealant.
Specify the anchor types explicitly: one dead-load anchor per floor height to carry self-weight, combined with wind-load slip anchors featuring slotted holes. Call out PTFE (polytetrafluoroethylene) or nylon isolator washers between the structural steel bracket and the aluminum mullion to eliminate metal-on-metal galling and squeaking as the frame moves thermally.
Checking Torque Settings on Exterior Pressure Plate Screws
Exterior pressure plates provide the sole clamping force securing the insulated glass units against wind loads and gravity dead-weight on the setting blocks. Clamping force must remain strictly within design tolerances. Insufficient pressure causes water leaks and glass movement within the pocket; excessive pressure crushes the thermal break, fractures glass lites at edge contact points, or strips the aluminum screw spline inside the mullion.
Drawings must specify the exact fastener type, length, spacing, and installation torque. Standard details require grade 304 or grade 316 stainless steel thread-forming screws, usually 5.5-millimeter diameter (Number 12 gauge) or 6.3-millimeter diameter (Number 14 gauge). To prevent galvanic corrosion between the stainless steel screw and the structural aluminum spline, specify that screws feature an applied anti-friction ceramic coating, or install continuous synthetic isolating washers under screw heads.
Establishing the Correct Installation Sequence
- Center the insulated glass unit on setting blocks inside the glazing pocket, confirming nominal glass edge clearance of 11 to 14 millimeters.
- Position the exterior pressure plate with pre-installed gaskets and center it over the screw spline.
- Drive fasteners starting at the vertical midpoint of each profile and work progressively outward toward the top and bottom ends, avoiding trapped localized stresses.
- Set fastener spacing to 225 millimeters on center along the run, tightening spacing to 100 millimeters on center within 200 millimeters of profile ends and corners.
- Check final torque using a calibrated manual click-type torque wrench. Drawings must specify a target torque range, typically between 4.5 Newton-meters and 6.8 Newton-meters, tailored to the specific profile thickness and gasket durometer.
Never permit installers to rely solely on battery-powered impact drivers for final fastener positioning. Impact tools apply uncontrolled dynamic torsional loads that easily strip 2-millimeter aluminum web splines. Detail notes must mandate third-party quality control inspections that check and log fastener torque across five percent of all installed pressure plate screws on site before exterior beauty caps are snapped into place.
Common Mistakes in Direct-Glazed Detailing
Field investigations of leaking or failing curtain wall facades frequently trace problems back to recurring graphic and clerical omissions on contract documents. Review drawing packages thoroughly for these design errors:
- Running pressure plates continuously past mullion splice gaps: Pressure plates must split at every mullion expansion joint. A continuous exterior plate bridged across a moving structural joint will buckle outward in summer heat or snap its end fasteners during winter contraction.
- Misaligning setting blocks with perimeter weep holes: Setting blocks placed directly over weep paths block drainage and cause the insulated glass seal to sit submerged in pooled water. Detail drawings must specify dense silicone or neoprene setting blocks located precisely at the quarter points or eighth points of the glass width, with drainage routes offset by at least 50 millimeters.
- Omitting zone-sealing plugs at horizontal-to-vertical mullion joints: The intersection between the horizontal transom rebate and the vertical mullion rebate requires an injection-molded rubber or silicone zone plug, sealed with compatible silicone. Without this plug, water draining through the transom enters the vertical mullion cavity unpredictably, bypassing the designated exterior weep system.
- Showing unsealed fasteners penetrating the air barrier: Any screw passing through an internal transom tongue or anchor bracket must incorporate an elastomeric sealing washer or receive a pre-drilled dab of neutral-cure silicone sealant over the screw threads before insertion.
Practical Next Steps for Production Drafting
Transitioning from schematic intent to fully coordinated curtain wall shop drawings requires rigorous verification. Begin by confirming that all project-specific structural and thermal targets are clear. Review local wind tunnel test reports to determine peak negative suction pressures at facade corners and parapets, where fastener spacing may need reduction to 150 millimeters on center.
Coordinate directly with the facade structural engineer to establish baseline movements for the concrete building frame, including concrete slab edge deflection, column shortening, and story drift under lateral seismic or wind events. Confirm that the slotted holes on mullion floor brackets offer sufficient vertical play to accommodate these movements without transferring dead loads onto lower framing members.
Assemble physical mockups of atypical details, especially parapet terminations, deep spandrel transitions, and building expansion joints. Before final shop drawing sign-off, mandate full laboratory testing of a representative curtain wall specimen in accordance with AAMA 501 or EN 13830. Testing must evaluate air leakage, static water penetration, dynamic water penetration, structural wind resistance, and seismic displacement. Only through explicit detailing and verified physical testing can the direct-glazed curtain wall provide reliable performance over the lifespan of the building.